
Conversational App from Ground Up
Why this post?
For some time now, I’ve been reading and learning about large language models (LLMs) and their applications. I’ve read books, watched videos, and discussed the topic with my friends.
But at the end of the day, I’ve realized that nothing truly sticks unless one applies the concepts in a real-world project.
So here I am, trying my hand at building a conversational web-app from the ground up using LLM APIs.
The application would be a stripped down version of ChatGPT, without any bells and whistles, and would focus on the LLM capabilities.
Since I’m building as I go, I’ll continue updating this post with links to follow-up posts as this project evolves.
NOTE: Looking at how rapidly this space is evolving, I won’t be surprised if this post gets outdated, or some code snippet doesn’t work as expected. If that happens, feel free to reach out-or better yet, raise an issue on GitHub
How am going about it?
The primary focus of this project is to explore how to use LLMs and associated tools to replicate the conversational capabilities of ChatGPT.
As UI/UX isn’t the primary focus here, I’m using Streamlit to quickly spin up a minimal chat web app.
I am breaking down (still a WIP :p) the project into multiple milestones:
- Setting Up: Build a minimal chat web app using Streamlit that connects to LLM APIs (via OpenAI) and displays responses.
- Add Memory: Incorporate conversational memory to maintain context across messages.
- (more to come…)
Each milestone will be saved in a separate branch in the GitHub repo. I’ll share the link to each branch in its corresponding post
So (wait for the cliché)… without further ado, let’s get started!
Setting Up
By the end of this milestone, I’ll have a minimal chat web application that uses the OpenAI API to send prompts and display responses to the user.
Prerequisites
I am using Python for this project, along with uv package manager.
You can check out my uv CheatSheet for quick reference.
I am assuming you have both Python and uv installed on your system. If not, refer to their official documentation for installation instructions.
If you prefer to explore the code yourself, refer to the branch correponding to this milestone here
Simply clone the repo to your system and checkout the branch:
NOTE: You would need to add an .env file containing your OpenAI API key. Refer to the subsection “Create a .env file” below.
git clone https://github.com/apesurd/ConversationalStack.git
cd ConversationalStack
git checkout milestone/01-setting-up
Create Project Folders
With uv installed, I created a folder for this project named ConversationalStack, and added 2 subfolders,i.e. frontend and backend, using the following commands:
uv init ConversationalStack
cd ConversationalStack
uv init frontend
uv init backend
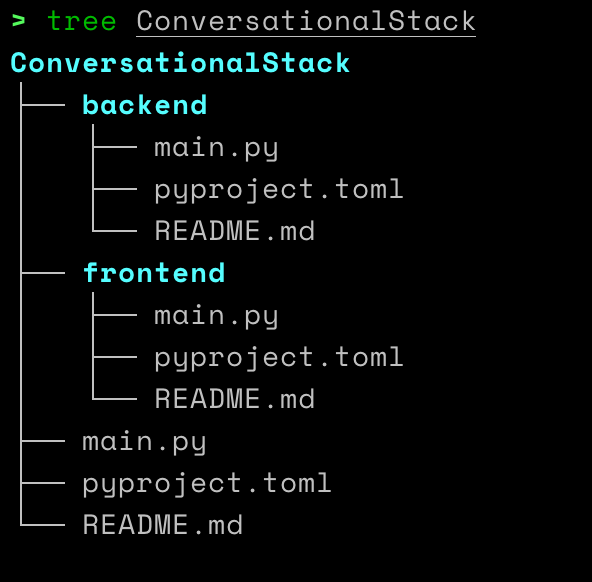
This created the following folder structure and files:
Set up virtual environment
In the root folder (ConversationalStack), I created and activated a virtual environment using the following commands:
uv venv
source .venv/bin/activate
Next, I installed the required dependencies into the virtual environment using uv:
uv add python-dotenv
uv add streamlit
uv add langchain-openapi
Create a .env file
In the root folder (ConversationalStack), I created a file named .env and added the following environment variables:
OPENAI_API_KEY=your_openai_api_key
OPENAI_MODEL_NAME=gpt-3.5-turbo
For this milestone, OPENAI_API_KEY is required for the application to run successfully.
In the later milestones, I would add support for using locally hosted LLMs or other LLM APIs.
NOTE: The .env file is not commiteed to the GitHub repository, as it contains sensitive information. I’m deliberately keeping it out of version control to avoid exposing my API key.
Here’s the code
For this milestone, I didn’t split the backend and frontend into separate folders.
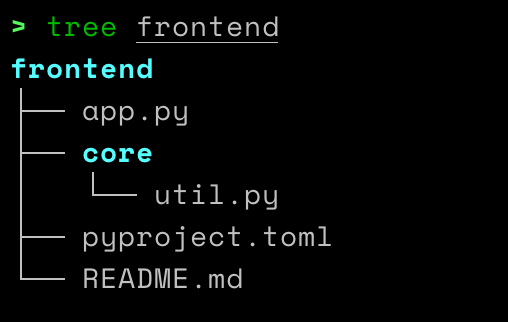
So letting the backend folder as it is and I created the following files inside the frontend folder:
Here is the code that went inside each of these files.
Since the implementation is pretty straightforward, I won’t go into too much detail.
I have added inline comments in the code to explain what each part does.
frontend/core/util.py
# FILENAME: frontend/core/util.py

# imports for this file
from langchain_openai.chat_models import ChatOpenAI
from dotenv import load_dotenv
import os

# load environment variables
load_dotenv()

# environment variables for this file
OPENAI_API_KEY = os.getenv("OPENAI_API_KEY") # This loads the openai api key from the .env file
MODEL_NAME = os.getenv("OPENAI_MODEL_NAME", "gpt-3.5-turbo") # This loads the openai model name from the .env file. If no such env variable is defined in the .env file then it would default to "gpt-3.5-turbo"
MODEL = None # This is just a global variable to hold the model object once it is created.


def _get_model(**kwargs):
    """
    This function returns the ChatOpenAI model object.
    Checks if the model is already created, and if not then creates it.
    """

    global MODEL, OPENAI_API_KEY, MODEL_NAME

    assert OPENAI_API_KEY is not None, "OPENAI_API_KEY is not set" # fails if OPENAI_API_KEY is not set

    if not MODEL:
        model_name = kwargs.get("model_name") or MODEL_NAME
        MODEL = ChatOpenAI(model_name=model_name, openai_api_key=OPENAI_API_KEY)
    return MODEL


def get_response(input_data):
    """
    This function is responsible for calling the LLM API and returning just the response.content of the response.
    """
    model = _get_model()
    response = model.invoke(input_data)
    return response.content
frontend/app.py
# frontend/app.py

# imports streamlit and a util function to request the response from the LLM API
import streamlit as st
from core.util import get_response as get_ai_response

st.title("Conversational Stack") # title of the application

# Since streamlit executes the code from top to bottom, we need to create a global variable to hold the chat history.
# This global variable is stored in the session state of the application.
if "chat_history" not in st.session_state:
    st.session_state.chat_history = []

# Utility function to append messages to the chat history
def update_chat_history(role: str, message: str):
    st.session_state.chat_history.append({"role": role, "content": message})

# display chat messages from history on app reload
for this_message in st.session_state.chat_history:
    with st.chat_message(this_message["role"]):
        st.markdown(this_message["content"])

# react to user input
if prompt := st.chat_input("Say something"):

    # update user's latest input to the chat message display
    with st.chat_message("user"):
        st.markdown(prompt)

    # call the LLM API
    response = get_ai_response(prompt)
    # update model's latest response to the user input to the chat message display
    with st.chat_message("assistant"):
        st.markdown(response)

    # update the chat history with the recent user input and model response
    update_chat_history("user", prompt)
    update_chat_history("assistant", response)
Run the application
In the root folder (ConversationalStack) I ran the following command (after activating the virtual environment):
streamlit run frontend/app.py
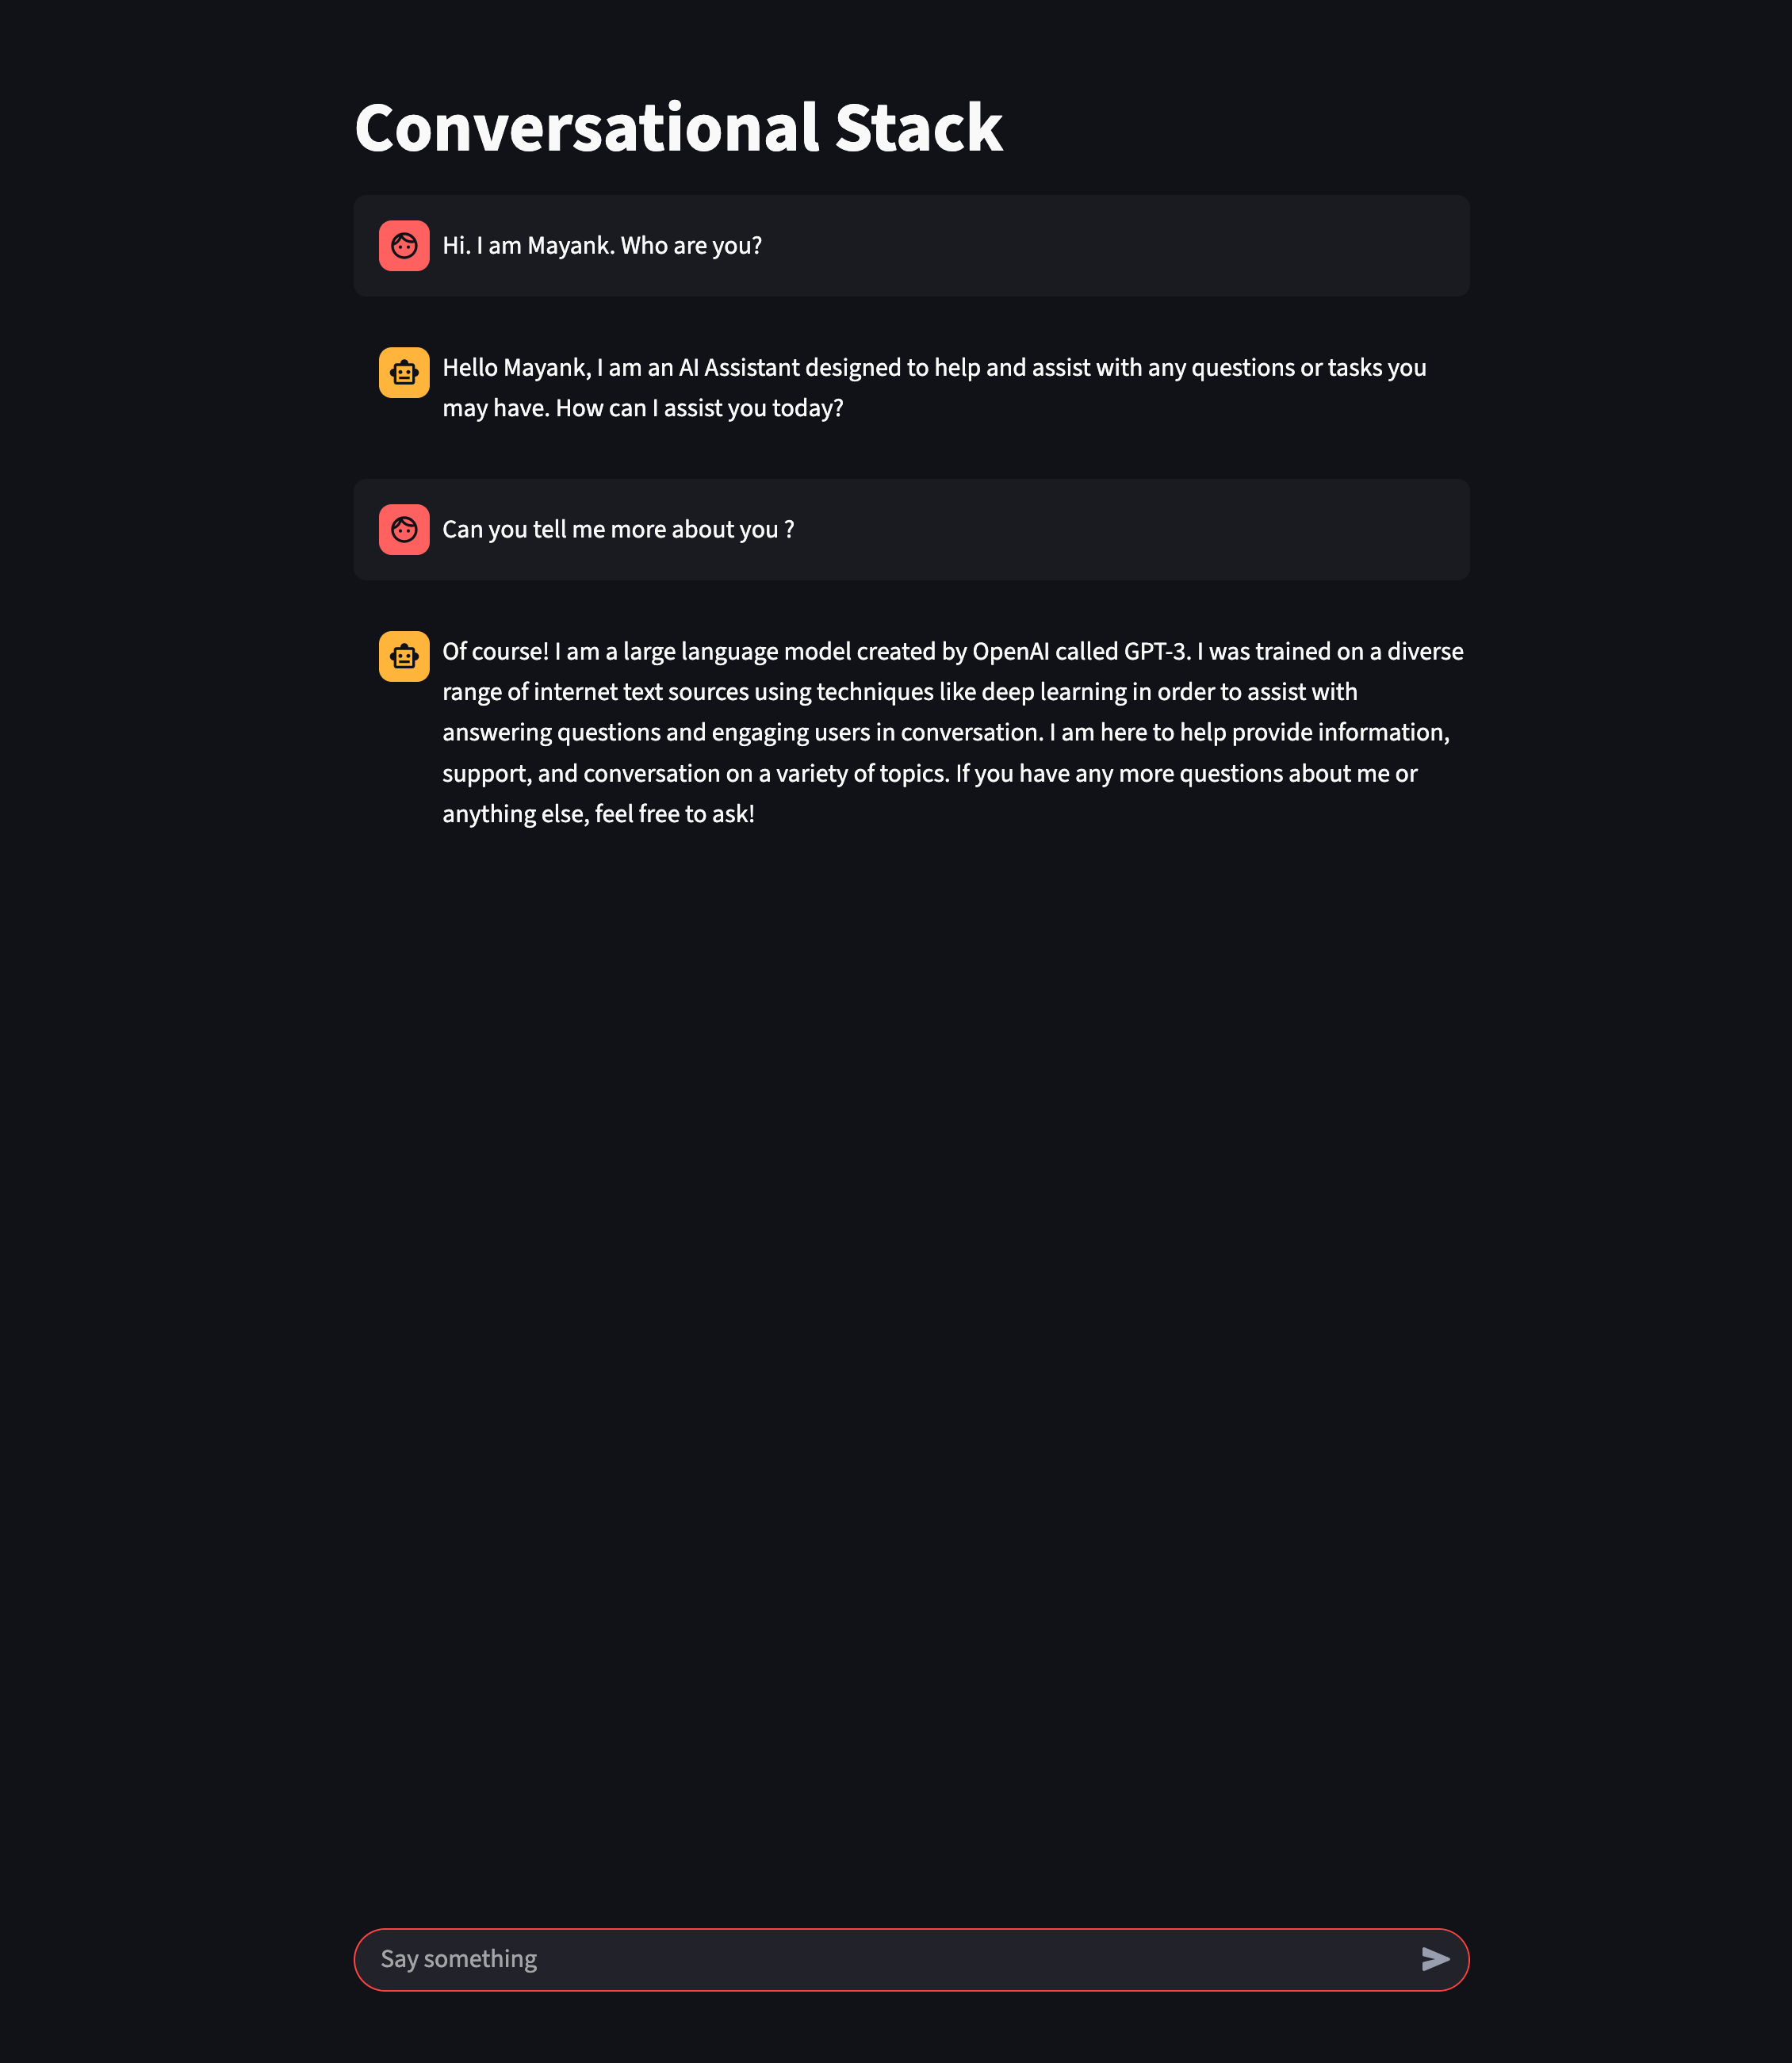
How it looks
So after everything, my application looked like this on the browser:
Conclusion
So now I have a basic, working chat interface that uses the OpenAI API to send prompts and display responses to the user.
In the next milestone, I would incorporate memory into the conversation flow.
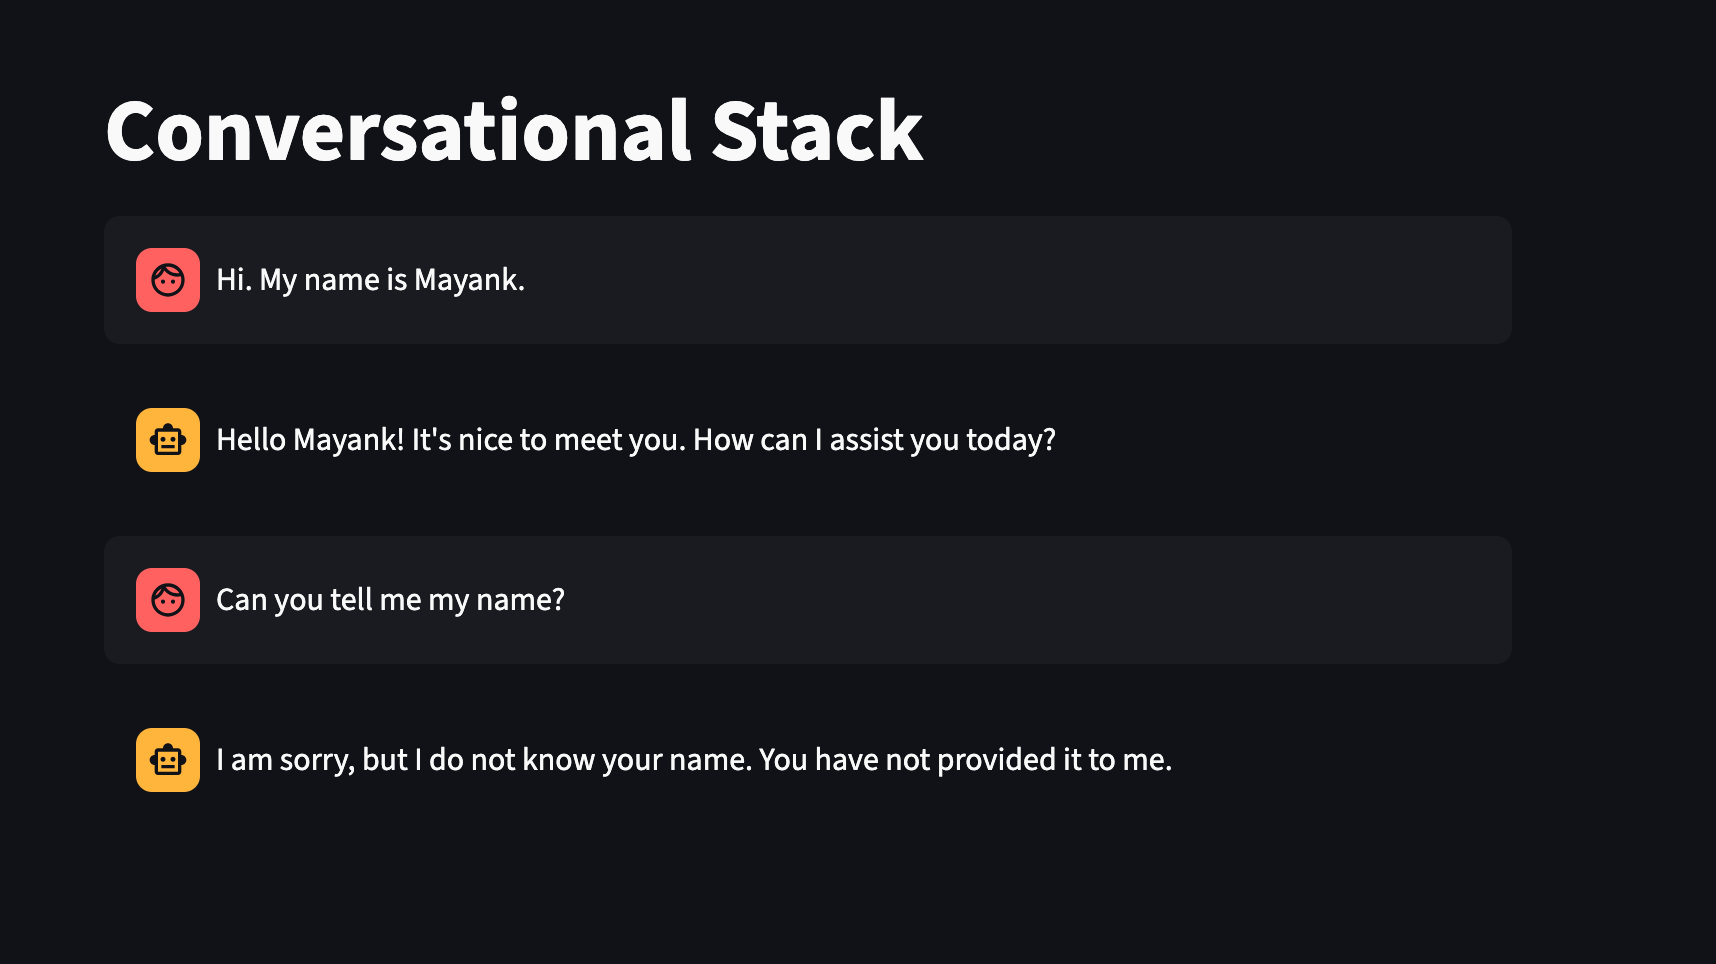
Right now, the app sends only the most recent user prompt to the OpenAI API.
That means the model has no context of previous exchanges, so it can’t remember anything I said in the previous exchange.
I would cover memory in the next milestone, so that I don’t face issues like this. :(
If you are coding along or have suggestions, feel free to reach out to me. You can also follow the progress on GitHub FIN